Secondary glazing listed buildings.
Secondary double glazing leaded light windows in listed buildings.
How to invisibly secondary glaze a leaded light window in a listed building.
If you live in an old grade 1 or grade 2 listed building here's a simple non invasive way of Secondary glazing listed buildings. Use this method to secondary glaze the windows without causing any damage to existing glazed units, frames or surrounds and without needing any permanent fixing in the form of screws, brackets or nails, making it very simple and clean to install and very simple to remove should you require it.
Secondary glazing listed buildings using this method means that you will not be damaging any of the existing structures. That being in the form of fixing points.
This is a system that I thought up myself as I too live in a grade II listed building. I could not get planning consent to replace my existing leaded light windows with double glazed units, despite finding companies that could, at great cost I hasten to add, produce double glazed units that were totally in keeping with the overall look of the building. That is, from the outside and inside you would not have known the difference. They were also very specialist and made units for some very prestigious old grade I and grade II listed buildings.
How to cheaply and almost invisibly cure draughts and reduce outside noise.
Being fed up with the draughts and road noise from outside I came up with this method of cheaply and almost invisibly double glazing my windows. This was over 15 years ago, and to date they are still intact and in full working order. Also reducing my heating bills, cutting down on draught's and muting the sound of outside noise greatly.
I have now decided to share my method with you.
Double glazing is a costly business and to get special glazing units made up to go in listed buildings, especially if like mine you live in a conservation area is not only sometimes an impossible feat, as some planning officers, listed building officials and parish councils will not see sense, but also a major cost. The reason for this being that its classed as a specialist custom unit and so you pay specialist custom prices.
I know 15 years ago to get 5 units measuring approx 39cm x 91cm’s refurbished with laminated glass reinforcement and replacement brass saddle bars would have cost me well over £2000-00. Money that during the ongoing renovation of my property I just could not free up at the time.
To have also had secondary double glazed units made up I cannot even imagine what the cost would have been.
Secondary glazing listed buildings: Materials needed.
For this simple project you will need:
Doorstop timber or MDF.
The timber I used was 12 x 32 x1200mm. You can buy thinner timber but the thinner the edge, the harder it will be to get a firm fixing and good seal.
Measure around the sides of all your windows to work out how much timber you will need.
Clear Silicone.
Depending on how many windows you are secondary glazing you will need to decide how many cartridges you will need. An average 310ml cartridge with a bead gap depth of 4mm and bead width of 3mm will give approximately a 25 linear metre bead of silicone. You will need to go around each window a total of three times per unit as I will explain as I go. If you have white painted masonry as I do you can use white silicone.
You will also need a silicone gun to dispense the silicone. You can usually obtain one fairly cheap online or from where you buy your silicone cartridges.
Perspex/acrylic sheeting.
You will need to measure the size of the opening and then allow for enough sheets of Perspex/acrylic to cut the units you require. The average sheet sizes are 60cm x 1.2cm or 90cm x 1.8cm and vary in thickness. The thickness is down to you and your budget, but you will find the thicker the sheet the better the sound muting and insulating quality.
Glass bead/glazing bead.
You will again need to allow approximately the same amount of glass bead as you have for the door stops. The type and profile of the bead are entirely up to you so choose what you think will best suit the existing moulding profile on the existing mullions or frames.
Adhesive stick on draught strip.
If you have any leaded light windows that open you'll need to use a draught strip. See stage 5 of this tutorial.
Secondary glazing listed buildings. Stage 1: Preparing your windows.
Before beginning this project, I first suggest that you thoroughly clean your windows and where possible, if they rattle, it might be an idea to carefully tighten the wires on the saddle bars.
Quick tip:
1) To clean the glass use warm soapy water (some people suggest vinegar water). Then wipe off with newspaper or a leather shammy as they tend not to leave smears on the glass.
2) If any of the wires are broken on the saddle bars then a quick fix will be to put a tiny blob of silicone between the saddle bar and glass panel before you secondary glaze it. When the silicone sets it will hold/support the window and also act as a shock absorber thus reducing the rattle.
3) If the mullions or frames are painted it might be an idea to touch them up if they are looking a little worse for wear. Once the units are in place you will not be able to do so.
With the windows clean and tightened up and the mullion's/frames looking fresh you can now proceed.
Stage 2: Making the insert frame.
1: Measure the top and bottom of the window aperture as shown in the diagram below. NB: it’s important that you do this first. Make sure you measure right into the corners as a snug fit is required.
Cut your top and bottom pieces first and label them. With old windows the lengths may vary slightly and it is important that you get a good fit.
NOTE: It is very important you cut the frame pieces in this order as the side pieces will hold the top in place allowing you to continue to work without it falling off.
2: Next measure up both sides of the aperture.
Note: Before cutting them to the length, you will need to remember to take off the depth of both the top and bottom pieces. 12.5mm in my case X 2 =25mm and mark them out. (the overall length of the sides, less 25mm if you are using 12.5mm deep door stops). Make sure your cut is accurate as you will again need a snug fit in order to be able to build the rest of your unit without needing to wait for the fixings to dry.
Painting the top, bottom and side pieces.
With both the top, bottom and side pieces made and labelled it is now time to paint them to match the mullions or existing frames. For this, I first primed them and then I used standard brilliant white emulsion paint, but you can use whatever paint suits you. If your mullions are unpainted then perhaps a natural stone looking paint would be better. It is important that you try to colour match your glazing frame with the aperture you are going to fix them in as this helps to hide the unit.
Preparing the Acrylic sheet.
While you are waiting for the paint to dry on your frame inserts you can now measure the overall aperture size and cut your acrylic sheet to size.
Make sure you allow a couple of millimetres clearances on all edges as you do not want the sheet to be bowed in the aperture or the corners to crack or break off when inserting it. This also allows some of the silicone you'll be using to fix the acrylic sheet to creep around the edges to form a good seal.
 Very Important:
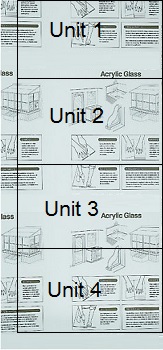
Leave the protective coating on the acrylic and do all your marking out on it. You can mark it out using a sharpie or pencil. Do not remove the protective coating until you are ready to insert the sheet into the opening. Also if you are secondary glazing more than one unit keep your marking out and cutting to a minimum as shown in the picture. This reduces the risk of breakage and will also save cutting time. If your units vary in length and width try to use the acrylic sheet as economically as you can.
How to cut Acrylic sheets.
To cut the acrylic sheet, use a sharp knife and a long straight edge, or a fine-toothed saw.
If you are using a knife be sure to score the acrylic sheet at least halfway through before attempting to break it. Not doing so may cause it to crack. Also do not press too hard on the blade as this can crack the acrylic too. Alternatively, use a sharp fine-toothed saw. This method I found better as I knew that the sheet was being cut all the way through. I also had more control over the cut without the need to press down onto the sheet. Do not rush and try not to press or lean on the acrylic sheet while you are cutting it as you could accidentally crack it. Also, leave the protective coating on both sides after you have finished cutting the glazing units. This is very important.
Secondary glazing listed buildings. Stage 2: Inserting the glazing frame.
Once your inserts have dried place them in the aperture in the order you labelled them to make sure they fit snuggly.
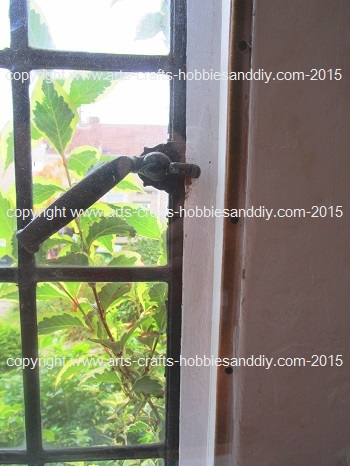
Very important: If you are secondary glazing a leaded light window that opens see stage 5. Make sure you insert the frame slightly forward of the handle to allow enough clearance for the glazing sheet.
If you are happy with the fit you can now put a continuous bead of silicone on the back of each piece. Shown in red in this tutorial for clarity, ready to insert them as shown in the illustrations below. Make sure you leave about a 10mm gap off the saddle bars as shown below.
You may need to measure for this if you cannot do it by eye. Quick cheat: A quick way to line up the top and bottom pieces is to place a side piece flat against the saddle bar and mark the top and bottom on each end of the opening. This will give you an even space and make it easier to line your insert frame up.
How to Install the secondary glazing framework.
Step 1: First insert the bottom piece. Make sure you place it as accurately as you can so as not to smear the silicone all over the window frame and making sure it is approx 10mm back from the saddle bars.
Step 2: Next take the top piece in one hand and a side piece in the other as shown. With the silicone facing the existing frame faces offer the top piece accurately into place while also offering the side piece in.
To insert the side piece line it up and place it on top of the bottom piece keeping it tight into the corner. You may need to angle the side piece back slightly as shown while holding the top piece in place. Slide the side piece along the face of the top piece keeping its edges flush at all times until its firmly fixed against the mullion/frame. See the example below.
You can see why its important to cut the top and bottom pieces first as the uprights will hold them in place.
Step 3: This should now hold the top in place. Now use the same method to insert the other side of the frame insert as shown also.
 Press firmly around all the faces of your frame to make sure the silicone has good contact with the existing opening as this is what will hold your secondary glazing unit frame in place. If your existing aperture is slightly uneven you can apply extra silicone where needed. To do this run a bead of silicone where necessary. Then gently rub it with a damp finger or cloth to push it into the gaps.
Using a damp smooth cloth, be sure to wipe off any excess silicone from the back of the frame, Glass side.
Secondary glazing listed buildings. Stage 3: Adding the Acrylic sheet.
With your frame now firmly in place first make sure there is not any dust, hair or debris around your frame. It is advisable you use a vacuum cleaner to make sure you pick up any loose debris.
With that done you can now firstly offer the acrylic sheet into the opening. (Do not remove the protective covering) This is to check that its a good fit and will also allow you to make any small adjustments should they be needed. Make adjustments by using a piece of fine sandpaper and sanding the edges accordingly. Check again that it fits first and if that's the case run a thin bead of silicone all around the outside edges of your frame. Shown in red below, ready to receive the acrylic panel.
Removing the protective film on the Acrylic sheet.
 Important: Now it is time to remove the protective film from the face that will be in contact with the silicone. Remove it only when you have already run a bead of silicone around the frame. Do not put it down anywhere. Also keep it away from your body. The static created removing the film will pick up every hair and piece of dust it comes into contact with. Including any you may have on your clothes.
Remove the film, quickly check for any dust etc. If its clean then immediately put it in place on the frame. If not clean it first. On installation apply gentle pressure to ensure you get a seal between the frame and the acrylic. Also try not to spread the silicone beyond the edge of the frame. With that done you should now have your secondary glazing unit almost finished. You should also already notice a difference in draught's and outside noise levels.
Secondary glazing listed buildings. Stage 4: Adding the glazing bead.
To finish the unit off take your glazing bead and cut a piece to fit each side of the unit. Check the angles in each corner as you may find that your window aperture's not square which occurs often in old properties. With that said, first cut each bead to length and then place them dry in the opening. Mark the angles accordingly by overlapping them before cutting.  . Dry fit the beads first to make sure they are correctly cut and fit snugly to the corners. If they are slightly out you can always fill them with a little silicone.
Tip: Before fitting the glass bead, paint it the same as the frame, then allow it to dry. Check the fit again and if everything fits firstly remove the second protective film from your acrylic unit. This time only remove enough to allow a small bead of silicone all the way around the edges of the frame. Keep it tight to the joint between the acrylic sheet and the mullion. As shown in red in the image below. With that done push the beads into the silicone starting with the side pieces to provide a sealed fit. Next, carefully apply even pressure all the way around the bead to get an even seal and you are done.
All you need to do now is to wipe off any excess silicone with a damp cloth and leave the unit to set.
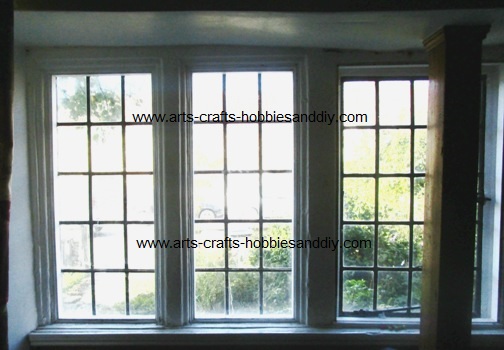
Once the unit has set it might pay to apply a second coat of paint to finish the job off. As shown in the photograph at the start of this tutorial. To avoid getting paint on the glazed unit you can put masking tape around the edges first.
Secondary glazing listed buildings. Stage 5: Leaded light opening windows.
For opening windows, you will need to replace the silicone bead with a stick on draught strip. Then carefully screw the panel to the frame. This will allow you to remove the glazing unit during the summer months and replace it in the winter.
You will first need to mark out a series of holes as shown evenly spaced around the glazing panel. Make sure they line up with the middle of the timber frame sides, top and bottom. Then carefully drill them out with a drill that is slightly bigger than the shaft of the screw you are using.

Tip: To prevent the drill from skidding across the acrylic sheet, first stick a piece of masking tape around the edges of the glazing panel before marking it out. This will allow you to fix the panel without risking putting stress on the acrylic sheet.
Once you have drilled all your holes around the acrylic glazing panel place it against your frame. Then mark out each hole on the frame using a pencil. Once that's done choose a smaller drill and drill pilot holes on each mark. Make sure that your drill tip hits the mark that you made ready to receive the screw.
Tip, To help hit the mark you can use the tip of a compass or the point of a small cross head screwdriver to mark the hole. This will help guide the drill tip into place.
 With that done you can now stick on your adhesive draught strip as shown in orange. I used a foam draught strip as it gives less resistance on the acrylic sheet than if you use a rubberised draught seal.
Inserting the glazing sheet.
With the draught strip placed around all the edges of the frame you can then insert your glazed sheet. Remember to peel off the protective coating from the acrylic before offering into the frame. As explained earlier in Stage 3.
To fix your glazing sheet in place I suggest you use small brass countersunk or mushroom head screws. The choice is yours really but brass is more resistant to damp. Therefore it will not corrode so easily, providing many years of use. Steel screws will rust and as they are of a small gauge they will be more prone to snapping off.  usedDolls House screws
 which you can purchase on the link. To fix the glazing unit first loosely locate the screw holes through the draught strip. Now begin tightening them up from the top down on each side. Do not over tighten them as you will crack the sheet. All you need to do is to provide enough tension on the screw to make a seal.
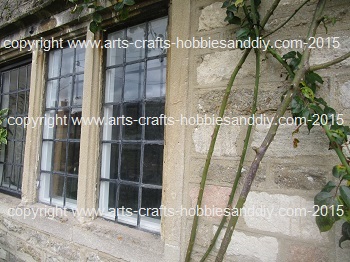
This is an outside view of the units in place. As you can see they are barely noticeable and look neat and not out of place.