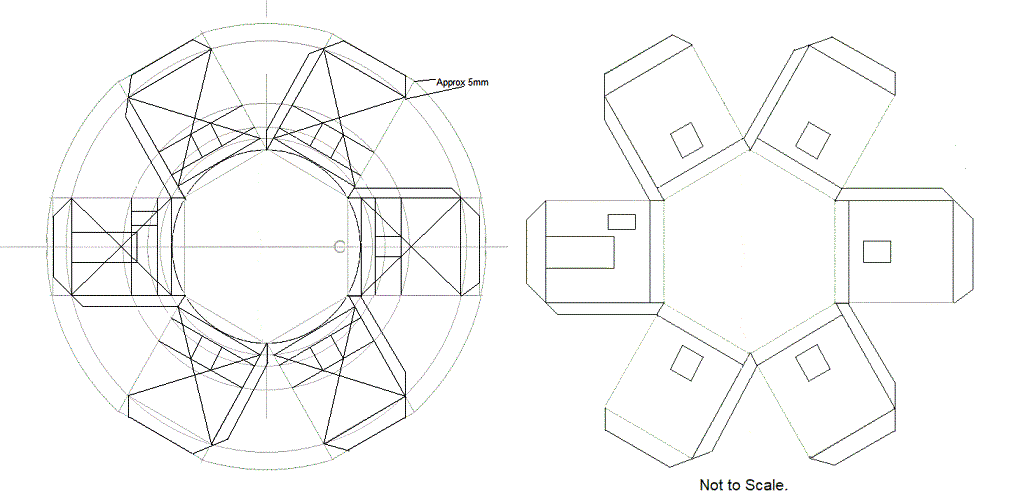
How to make a WWII Type 22 Pillbox model.
How to make WWII type 22 Pillbox diorama.
PT1 go to PT2 - PT3
Parent supervision required !!
In this simple easy to make tutorial you will be learning How to make a model WWII Type 22 Pillbox. For this simple project you will need:
An average Cereal sized Cardboard box or A4 craft card.
Ruler or set square.
A craft knife or Scissors
Pencil or pen.
Acrylic or watercolour paint. A paintbrush.
PVA adhesive or sticky tape.
Glue spreader or glue stick. The Type 22 Pillbox was a standard six sided (hexagonal) design making it an easy to make model and ideal for a Ks2-Ks3 learning related to WWII land defence.
Making WWII Type 2 Pillbox.
Take a piece of plain modelling card or a rectangular cereal box. Now find the centre of the card. This can be easily done by drawing a line from the top left corner to bottom right corner of the card. Then the top right corner to the bottom left corner of the card. Where the lines intersect is the center of the card.
How to draw a Hexagon shape using the steps shown below.
Firstly draw a center line the full length of your card. Measuring from the edge of the A4 card to the centerpoint and then apply the measurement to the sides of the paper before joining them up. For this tutorial I am using A4 card. Next set a compass to half the length of the overall width you would like the Pillbox to be. For this model the overall width will be 8cm's as this fits the A4 card perfectly. For an overall width of 8cm I will be setting my compass at 4cm's. If you are building a WWII diorama, first check the scale of other models you will be using and scale your model Pillbox accordingly.
Once you have set the compass keep it as is, do not re-adjusted at this point. Next place the compass on the centre line at the middle point of the A4 sheet. Draw a circle as shown below. 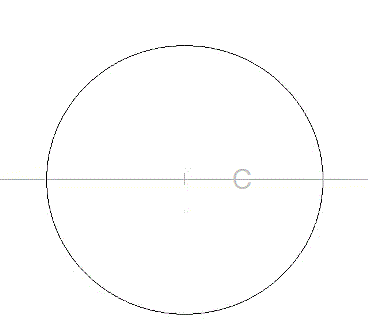
How to set out a Hexagon.
Check the compass is still set at the same distance. Now place the point of the compass on the line where the edge of the circle intersects the center line. Make a mark on the edge of the circle. Now place the compass point on the new mark and repeat the process until the circle has six equally distanced marks as shown. Join all the points to form the Hexagon. 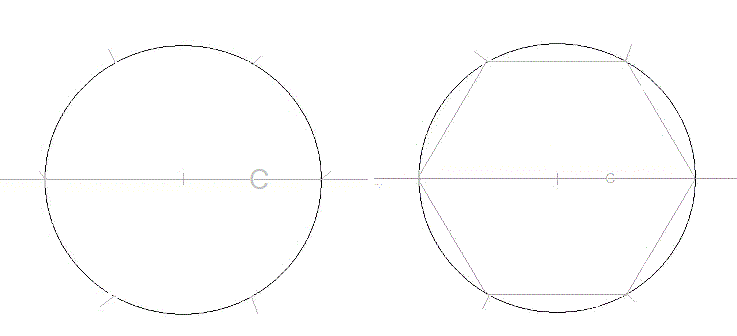
Forming the walls of a WWII model Pillbox
Once the hexagon has been formed the next thing to do is to set out the walls of the WWII Pillbox. Take a ruler or straight edge and place it across the opposite points of the hexagon. Next draw a line that projects past the edges of the hexagon on both sides. These will become the sides of the pillbox walls as shown below. 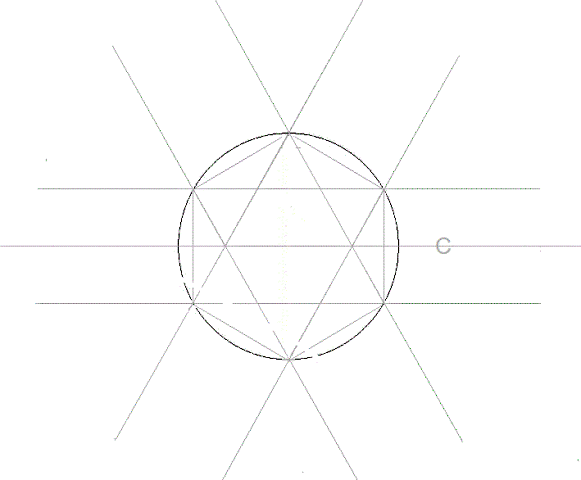 Once that is done, the height of the WWII bunker walls can be set out. In this model each walls approximately 45mm high. (not to scale) Note: If you are making a scale model remember to set your measurements accordingly.
However, for this model, measure 45mm from the edge of the hexagon down the side of one wall as shown. Now place your compass on the centre of the hexagon and set it to the measurement and draw a circle. This should ensure that each Pillbox side walls the same height. Now join the intersection points where the wall line meets the circle as shown. 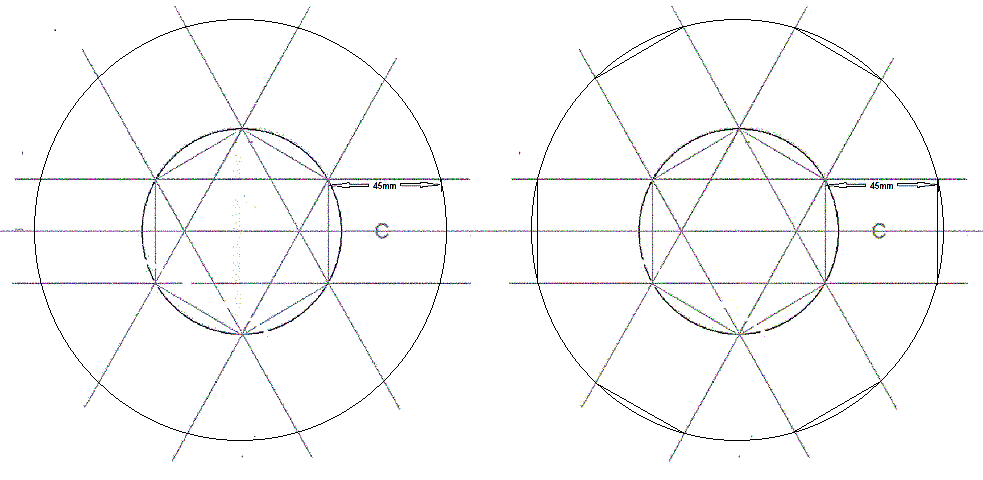
How to add the roof thickness to a WWII Type 22 Pillbox diorama
With the wall heights now set it is time to set the thickness of the Pillbox/Bunker roof which will help in setting out the Pillbox embrasure's (Gun slits). Measure down 5mm from the edge of the hexagon and repeat the same process as with the wall heights. Once thats done join the intersecting points as below. 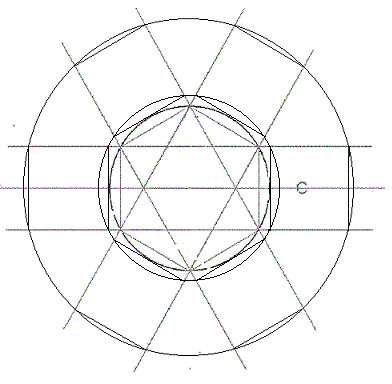
Adding embrasures / gun slits to a WWII Type 22 Pillbox.
With the roof thickness set it is time to add the embrasures (shooting and observation windows) to the sides of the WWII bunker. Firstly draw a line from the bottom edge of the roof thickness line where it intersects with the edge of the wall to the opposite corner of the wall bunker panel. Repeat the process on the other side to form a X. Then repeat for all the individual Type 2 Pillbox walls as shown below. 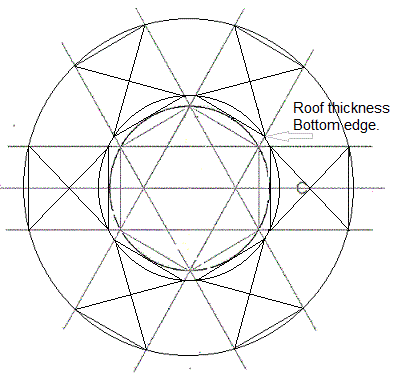
How to set out embrasure heights for a model Type 22 Bunker.
To set the embrasure (window) for this Ks2/Ks3 school model Pillbox, measure approximately 10mm down from the edge of the hexagon and as with the roof thickness, draw a circle to mark all the wall edges as shown. Repeat the process to set out the bottom edge of the embrasure (window). For this particular model based on a FW3 type 22 Pillbox built in Murlough county Devon, there is a soldier course of brick above the embrasures so we are allowing for these when setting out the openings. The bottom edges are situated approximately 25mm from the bottom edge of the pillbox wall panel.
With both circles drawn now join the intersection points to form the window openings as shown. Note: As mentioned earlier, in this model template the embrasures heights are higher as there is a brick course above them. For a narrower opening Join the corners of the existing heights as shown by the red cross labelled Heights for narrow gun slits. Then draw a line from the side walls through the intersection point as shown. 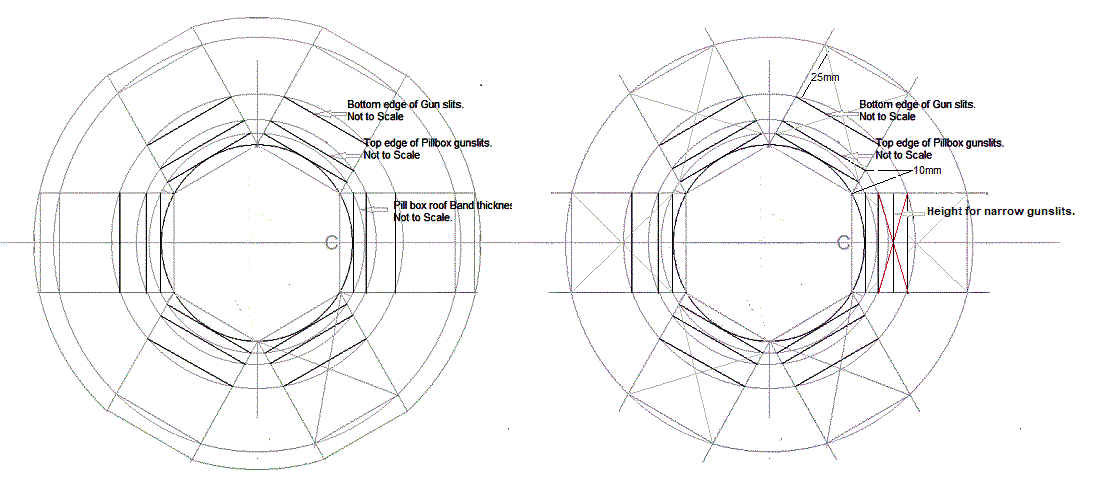 Next join the intersection points for each window where the bottom edge of the window intersects the large cross that was added earlier to the top edge of the window depending on which height you have chosen, as shown below.
Note: On one side there a door that is located centrally. It's height is just above the bottom edge of the narrow window. However door heights varied in most pill boxes so it is up to you how big it is. There's also a narrow window to the side of it as shown that's the same height as the other openings. 
Adding fixing tabs to a Diorama model template.
Now using a ruler measure 5mm down from the bottom edge of the wall panel and then using the compass draw another circle. Note: If you are making a template for educational use it is advisable to make the tabs slightly bigger as they will be less fiddly for little fingers to attach. With that done now draw a straight line to connect the edges where the sides of the bunker walls intersect with the circles to form the tabs as seen in the next images. Then using a 45 degree set square draw the ends of each tab. Once you have added the tabs cut out the template as shown.