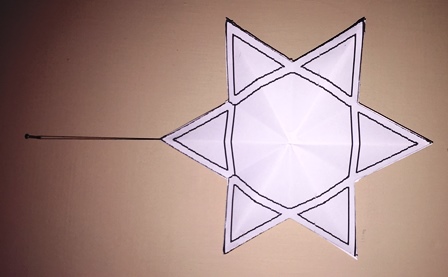
How to make a 3D Star of David.
How to make a Magen David.
How to make a 3D shield of David.
In this short tutorial, you'll be learning how to make a 3D Star of David, also known as the Magen David or Shield of David. This is a simple project which requires the minimum amount of materials. It would also be ideal for learning about Judaism beliefs and symbols.
Free downloadable templates.
Using our free downloadable 3D Star of David templates will make it very easy and it would be an ideal project for schools studying Judaism, Hebrew or general religious studies.
To make your 3D Star of David you will need.
A craft knife or Scissors.
Plain or coloured card.
A Ruler.
Crayons or coloured pencils (optional).
pastels or paints (optional).
Glitter (optional).
Foil paper (optional).
A paint brush (if using paint).
PVA adhesive or craft glue.
Small paint brush, Glue spreader or glue stick.
To begin, firstly download each image into your chosen file. Secondly, open each image in your prefered photo editing suite, MS Paint or similar. Now scale the Star of David templates to a size that is suitable to your needs. Make sure that you scale both images equally.
For this demonstration tutorial I will be using two plain sheets of A4 craft card. However before printing I will make sure that I have a slight equal page margin to prevent any image clipping. 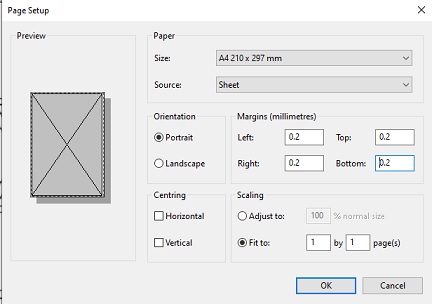
Click on the image to download it:
Click on the image to download it:
If you are unable to download or print off a template please first see How to draw a Star of David. for instructions on how to mark out and draw a 3D Star of David template.
If however, you'd prefer to make a 2D star of David please also see How to make a 2D star of David.
Depending on the size of the star you require, the templates can be scaled up or down accordingly. Note however, that the smaller the star the fiddlier it will become to assemble.
Cutting out.
Once you have printed off both templates A and B of the free 3d star of David templates you will first need to cut out both stars and the reinforcing ribs.
Note: Follow the lines carefully making sure that you do not cut off the fixing tabs on template A.
With your templates now cut out it is time to create the folds that will give the Magen David it's 3D effect. When making each fold make sure that the fold line, lines up with the the center of each point of the star. Important: Fold the lines according to the diagram shown. Fold all lines shown in black from the back of the template (plain side) and fold all lines shown in red from the front of the template (Printed side). This will help create the 3D effect when the stars fully assembled.
The best way to accurately fold the templates is to place a straight edge along the fold lines and then using a ruler, set square or similar gently ease the card up until it is tight to the other straight edge. As shown in the next picture. 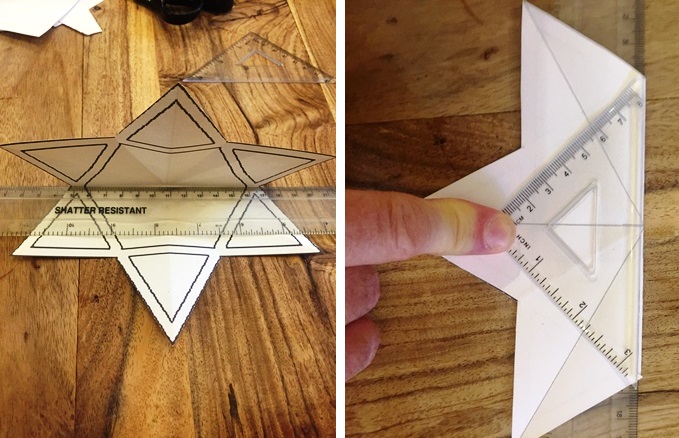
With both templates done carefuly pinch each section to create the 3D effect as shown in the picture below. 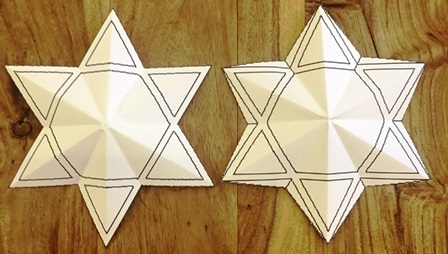
Bending fixing tabs on Template A.
First carefully snip between each tab on the lines between them. Next carefully bend each tab on template A as shown.
The best way to accurately bend the fixing tabs would be to place a straight edge along the fold line of the tab. Then using a ruler, set square or similar, carefully bend the tab. If you are having difficulty getting under the tab to bend it, use a craft knife to lift the edge at its widest point first. Then slide your chosen straight edge under the tab and bend tight to the edge of the other as shown. 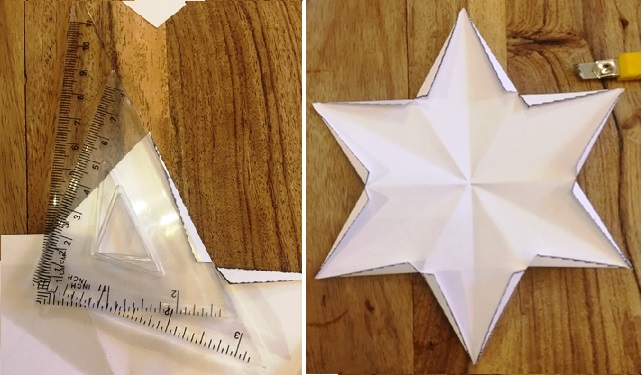
Once you have folded all the tabs on template A it is now time to assemble the templates.
How to make a hanger.
The first thing to do is to make a hanger which will enable you to hang it when complete.
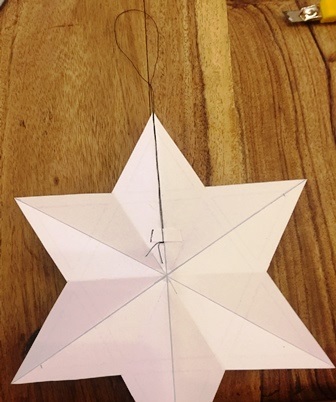 To do this take a length of cotton and cut it at twice the length that you want the star of David to be hung at. Now knot it together to form a loop. Next, add the looped piece of cotton to the top of template B as shown. This will be used for hanging your Star of David. You can easily fix this by first opening the loop and sticking a piece of card through the looped cotton thread. This will prevent it from being pulled out. Also apply a little adhesive along the cotton to centre it on the star decoration. This will also help keep it from being pulled out.
Adding reinforcing center ribs.
For this stage, if you are using thin card I recommend drawing around each rib to make duplicates. These can then be stuck together to reinforce each rib.
To prevent the 3D star of David collapsing on itself when assembling, and to give it strength when hung, you will need to put ribs in the center of each star point before fixing the tabs. This will help each point of the star hold it's shape and should prevent it from buckling or collapsing.
On template A there is one rib and on Template B there are two complete ribs. These will require carefull cutting out and then gluing to template B as shown. 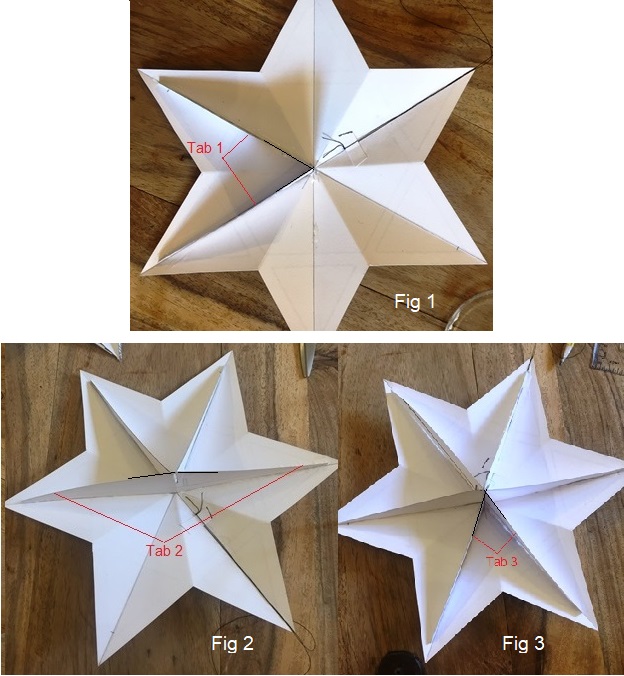
The first rib will need to be bent to form a V which will be stuck to two points of the star as shown in Fig 1. The second rib will be stuck across the two points as in Fig 2 making sure that you also stick it to the first tab at the center of the Star. The third rib will again need to be bent to form a V as with the first rib shown in fig 1, see Fig 3 and again glued to the second rib at the center.
You should now have all three ribs fixed ready to support the six individual points of the star and are now ready to put template A and template B together.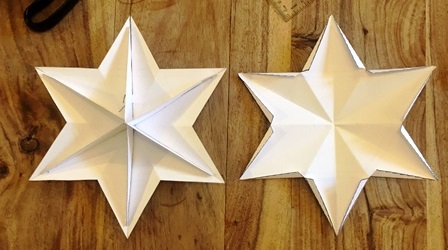
Assembling the 3D star of David.
With all the tabs bent and the ribs in place on template B using a small paint brush or glue spreader, lightly apply a thin layer of adhesive to the top edge of each rib on template B. Now take Template A and place it onto template B. Carefully line up each rib and lightly run your finger along each point of the star to make sure they are located along the center fold of each point.
Once located, hold them in place until they stick.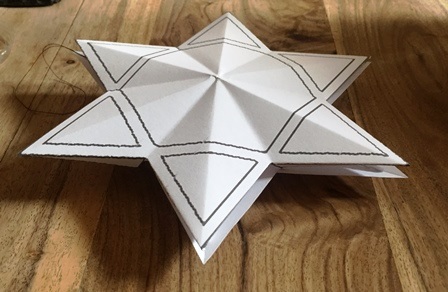 Leave them to stick firmly before taking each tab, two at a time, on template A and applying a thin coat of adhesive.
You will be applying adhesive to each corresponding tab in a V shape as shown. 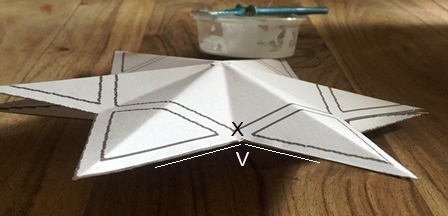 The reason for this is that when the tabs are held at point X as shown both tabs will come together. Important: Do not apply to much pressure as this may buckle the star. Carefully stick them to the template B. You may need to lightly pinch each edge to make full contact. Hold each tab in place until it has stuck firmly. Repeat this until all points become firmly stuck in place.
Decoration.
Once all tabs become secured in place leave it to dry before applying any finishes.
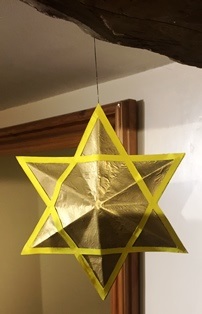
Depending on whether you used coloured craft card or plain card it is now time to decorate your star. You can do this by using Coloured pencils, Craft paper, Paint or Glitter.
I used Gold foil paper and Yellow Acrylic paint that you can purchase from the left side bar menu if needed.
How to make a 2D Star of David.
If you were looking to make a flat 2D Star of David follow the instructions above for Template B.
Simply cut out template B and either fold it, as shown or leave it flat.
If you drew it on coloured craft card all you need to do is attach a looped piece of cotton to the back of your 2D Star of David using sticky tape or adhesive and it is ready to hang. Alternatively you can decorate the free 2D star of David template using Glitter, Coloured pencils, craft paper or paint.
You may also like to cut the star out by care fully following the lines. To do this I would recommend using a sharp craft knife.