How to draw an iphone.
Draw a mobile phone.
How to draw an iPhone that is tilted.
How to draw an iPhone.
Drawing iPhones made easy
Below are some quick and easy to follow tutorials on How to draw an iPhone. I have chosen the iPhone 6s but this tutorial could be used to draw any mobile phone. Most mobiles are basically the same shape including the iPhone Max. I will demonstrate how to draw an iPhone in various positions, ie from the front, from the back and tilted.
Drawing a basic iPhone body shape.
How to draw an iPhone front on.
The first thing you will need to do is to take a ruler and lightly draw a rectangle with a length that is twice its width, as shown. You can also do this freehand if you prefer.
Adding rounded corners to an iPhone body.
Carefully round off each corner either freehand or by using a coin, button or similar rounded object. Place it against the horizontal and vertical lines in each corner so that it evenly touches both, then draw in the radius of each of the corners.
How to draw an iPhone: Adding a menu screen to an iPhone.
To do this draw a rectangle that is approximately 1⁄9 of the length of your phone in from each end. For example, if your rectangle is 90mm long from top to bottom then you will draw your line 10mm in from the top and 10mm in from the bottom edge of the phone. Then using your eye, carefully judge the sides of your menu window. If you were drawing an iPhone that was 45mm wide then your lines would need to be approx1⁄20 of the width or 2.25mm in from each side. 
How to add a front facing camera, ambient sensor and ear speaker to an iPhone 6s.
Find the centre of the top and bottom of your iPhone drawing by either measuring it or judging it. Next, find the middle of the space between the top edge and menu screen and carefully draw in the iPhones front-facing camera. Next, carefully draw in the ambient sensor and ear speaker.
How to draw an iPhone: Adding a home button to an iPhone drawing.
Using the centre line at the bottom of your iPhone draw a circle that is 1⁄9 the width of your iPhone body. For example, if the overall width of your drawing is 45mm then the overall circumference of your circle will be 5mm. Place the home button centrally to the lower part, making sure the gaps at the top to bottom are equal.
Draw an iPhone: Adding control buttons to an iPhone 6S
The initial iPhone drawing is now almost complete. All that is now required is to add the Ring silent switch, the sleep wake button and the volume button. The ring silent switch and volume buttons are located on the left-hand side of the iPhone 6s. The sleep-wake button is located on the right of the iPhone. The iPhone 6s also has a headset jack, microphone, lightning connector and speaker at the bottom of the phone body. However, these cannot be seen on a front view of an iPhone 6s.
The button we are going to add first is the ring silent switch. It is positioned approximately in line with the top edge of the menu screen. Then we will add the volume buttons. These are a little more than twice the length of the ring silent switch with a small space between them. The sleep-wake button is opposite the top volume button.
Adding app icons to your iPhone.
With the iPhone drawing now complete you can add some App icons or a picture to your iPhone drawing. If you want to add some iPhone apps icons you will first need to divide the width of your menu screen into 13 equal parts. Then with that done draw a faint line on the first mark. Next, miss 1 line and draw a faint line on the third mark. Then a line on the forth. Miss a line and draw one on the 6th mark and so on as shown.
Repeat the process down the side of the app menu window but this time only add lines to form the app icon boxes, as shown. To form the icon menu at the bottom of the screen draw a complete horizontal line at the third mark up from the bottom, then place your icon tabs. Allow an equal distance at the top and bottom which is halfway between the first and third line up, as shown. 
How to draw an iPhone: Finishing off your iPhone drawing.
To finish off your iPhone drawing you can either leave it as it is with a blank screen or add some iPhone app icons as seen
How to draw an iPhone from the back.
In this tutorial, you will be learning to draw an iPhone from the back.
Firstly, draw a rectangle either freehand or with a ruler that has a length that is twice it's width, as shown.
Round off each corner of the rectangle either freehand or by using a button or small coin as shown. Once that is done draw a line straight across the phone body from the edge of the curve on each end, as shown.
Next add the Ring silent switch, the sleep wake button and the volume buttons to the body of the iPhone. The ring silent switch is located on the left-hand side as viewed from the back. It is positioned at approx 1⁄9 of the length of your phone in from the top. For example, if your rectangle is 90mm long from top to bottom then you will place your sleep/wake button approx 10mm in from the top left of the iPhone. Next place the ring silent button opposite followed by the volume buttons. Make sure that the bottom edge of the 3rd button is located at approx 1⁄3 of the way down the right-hand side of the phone body. For example, if the length of your phone body is 90mm, then the 3rd volume button at it's furthest point would be 30mm.
How to add an iSight camera to an iPhone.
The iSight camera is situated on the top right-hand side of the iPhone when viewed from the back. Place it at the edge of the top curve and central to the top section, as shown. Allow approximately the camera lens width again and add the true tone flash. To do this draw a smaller circle, as shown. Next, between the iSight camera and true tone flash add the rear microphone, as shown.
How to draw the Apple logo.
The easiest way to draw the Apple logo is to first draw a square. Then draw a circle whose base is level with the bottom edge of the square and whose sides touch the top edges of the square as demonstrated. Next, draw the Apple logo as shown. 
How to add an Apple logo to your phone.
The next thing to do is to divide the width of the iPhone body in half. To do this, measure the width of the iPhone and divide it by two. For example, if the measurement is 45mm then your center line would be at 22.5mm. With the center located lightly draw a line the length of the phone back. The furthest point of the Apple image is located at approx 1 ⁄ 3 of the way down the body. For example, If the phones body length is twice it's width it will be 90mm in total, therefore, the furthest point of the logo would be approx 30mm down.
The Apple logo is approx 1 ⁄ 5 of the body width in diameter so based on a 45mm body width it would be 9mm and as it is almost a circle draw a box 9mm x 9mm with its centre on the line that you have just drawn. Then draw a circle whose base is level with the base of the square and whose circumference touch's the top corners of the square, as shown above.
With that done, you can now add the iPhone label. The label is located approx 7 ⁄ 9 down the phone body so if for example your phone body measures 90mm in length then the iPhone writing would be located at 70mm from the top. Once you have included the iPhone label you have finished your basic drawing of the back of an iPhone.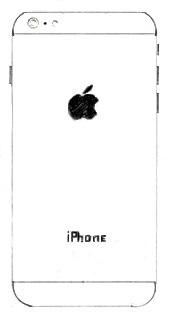
How to draw an iPhone that is tilted.
In this quick and easy to follow tutorial you will be learning how to draw an iPhone that is tilted.
Setting out the iPhone body.
Firstly, you will need to draw two lines that are slightly at an angle. One long vertical line and one line that is half the length of the vertical line, as shown.  Next, draw two more lines of equal length replicating the angle of the first two to form an offset rectangle. Measure the distance of each to set them out correctly, if needed.
Adding visible sides.
The next thing to do is to add the visible sides to the iPhone. To do this firstly draw a line slightly in from the line on the left-hand side of the rectangle. Then draw another line slightly in from the bottom line. You will notice that the bottom line has a thinner gap between the two lines. Then round off each corner as shown.
How to draw an iPhone: Adding a screen to an iPhone.
With the iPhone body now taking shape, add the menu screen. First, measure the distance between the top edge and inside bottom edge as shown and then divide the distance by nine. For example, if the measurement is 90mm then each section would be 10mm. Once you have your measurement, mark it in from each end and then lightly draw a line as shown.
The iPhone menu screen.
Next, add the sides of the menu screen whose widths are approx 1 ⁄ 20 of the width of the phone so if your drawing is 45mm wide from the inside to the outside edge of the phone front as shown, your measurement would be 2.25mm in from each edge. 
Drawing an iPhone: Adding the sleep wake button and volume buttons.
The sleep/wake and volume buttons are located centrally on the left-hand side of the iPhone. They are approximately in line with the top edge of the iPhone menu screen as shown with the bottom edge of the lowest volume button located at just over 1 ⁄ 3 of the way down the side of the iPhone body. The sleep/wake button is half the length of the volume buttons with the gap between it and the top edge of the first volume button being approximately the same length. 
How to add the Facetime camera, Speaker, Home button, Headphone jack, Lightning port and Speaker to a mobile phone.
Firstly using a faint line, divide the front of the mobile phone in half lengthways. Then dived the top and bottom section in half widthways as shown. Carefully draw in Facetime camera, Speaker and Home button. You can do this by eye or by using the guidelines as shown. Then draw in the home button.
Next project the vertical line of the home button guide down, mimicking the angle of the base of the iPhone as shown, and carefully add the Lightning port. Using the Lightning port as a guide ad the Headphone jack and speaker holes, as shown.
Your drawing is now complete. You can add some apps or picture by following the instructions in the first tutorial.